News
DIY Solar Lights: Test for Outdoor Lighting
Continuation of the previous article: DIY Solar Lights: Smart Outdoor Lighting Solution Ⅱ: Another version of the timer IC allows for setting a timer from 1 to 8 hours. This simpler setup prevents false triggers and shuts off output as soon as the solar panel generates voltage.
Features were introduced in the previous article; this one primarily focuses on testing the timer function.


The TP4056 charging indicator light includes soldering points for an external connection, which can be used to monitor the voltage of the solar panel and the operation of the TP4056.

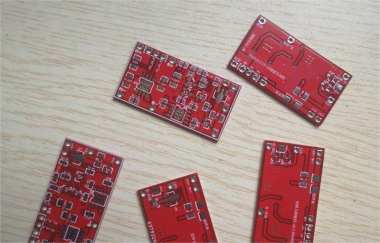
After soldering and testing the charging function and the solar light control (voltage control from the solar panel), everything worked as expected.

The 2nd and 3rd pins of the IC correspond to 8x and 64x the timer setting, respectively. If both are soldered, the multiplier is 512x.

Disclaimer: The following is a brief test, and factors such as circuit design and component variation could affect results. Testing showed a large deviation with the 512x multiplier, so it is not recommended to use such a high factor. Below are the test results:

Operating voltage 3.8V (similar to 4V, not listing 4V values), with a base RT value of 10K:
· Both 2nd and 3rd pins disconnected: 4-second timer, working as expected.
· 2nd pin soldered, 3rd pin disconnected: 8x timer, tested at 34 seconds (expected 32 seconds), a 2-second deviation.
· 2nd pin disconnected, 3rd pin soldered: 64x timer, tested at 288 seconds (expected 256 seconds), a deviation of 22 seconds.
· Both 2nd and 3rd pins soldered: 512x timer, expected at 2048 seconds (approximately 34 minutes), but after waiting over an hour, the timer did not shut off. Manually shut off power; the issue might be with the soldering of a subsequent resistor, as later tests appeared normal.
Third test: Started at 3:15 PM and ended at 3:56 PM, a 41-minute timer with a 7-minute deviation. Fourth test with 4.1V operating voltage: Started at 4:03 PM and ended at 4:43 PM, a 40-minute timer with a 6-minute deviation.
For a longer test with a 64x multiplier, an RT value of 1M ohm was chosen. The light stayed on for approximately 4 hours before turning off automatically. The test used a 5-year-old 3100 mAh polymer battery with an initial voltage of 4.04V. The LED had a constant current of 150 mA, with an actual current around 140–145 mA. Started at 12:02 AM and ended at 4:06 AM when the light turned off. At that point, the battery voltage was 3.78V.
In actual use, it is recommended to use either 8x (2nd pin soldered, 3rd pin disconnected) or 64x (3rd pin soldered, 2nd pin disconnected). The lower the multiplier, the smaller the deviation and impact on timer accuracy. Factors affecting timer accuracy include the working voltage of the IC, the capacitance and frequency of the C104 capacitor, the resistance value of the RT timing oscillating resistor, and circuit design.
From the timing reference list in the image, it is clear that using an RT timing oscillating resistor with values of 1M ohm and 10M ohm provides the most stability. Initially intended to use a 10M ohm resistor for a timer of 2046 seconds times 8, approximately 4.54 hours, but couldn't find a 1005 (106) resistor, so chose 64x with a 1M resistor. 208 seconds times 64 is roughly equal to 3.7 hours, plus deviation, it approximates 4.5 hours. Later testing confirmed a duration of just over 4 hours with about an 18-minute deviation, which is acceptable for several hours of nighttime lighting.

The 15-ohm RL_2 resistor on the back allows for continuous light at night with a working current of around 95 mA at 4.1V and 75 mA at 3.8V. Combined with the timer IC, it can provide high brightness in the early night and dim light later.
Drawbacks:
· High timer multipliers have deviations; for more sensitive timing, select 8x timer alone. Lower multipliers have smaller deviations.
· Once triggered, the timer cannot be completely turned off; the switch only cuts power to the LED, not the timer IC.
· Solution: First, solder the solar panel, then the lithium battery to avoid triggering the timer IC during installation.
· Lightning strikes in summer might trigger the timer IC again. No current solution.
Advantages:
· Timer shutdown allows efficient use of the lithium battery and prevents over-discharge.
· Timer can be set from a few seconds to several hours and can switch between high brightness and dim light modes for different scenarios.
· High brightness can use 7135 constant current, while dim light can use resistor current limiting.
· Wide input voltage supports 5V, 5.5V, 6V, and 7V solar panels.
· TP4056 lithium battery charger IC helps extend battery life.
· Integrated HC-SR501 module output interface with 7135 constant current.
To reduce size, the module uses all surface mount technology, which may not be beginner-friendly. However, if you are skilled with surface mount soldering, the module design offers functionality that can meet most needs, whether for nightlights or garden lights.


